Results appear as you type. Use the arrow keys to move and Enter to open. Press the slash key to come back here.
Customising the sales receipt
To customise the receipt, follow these steps:
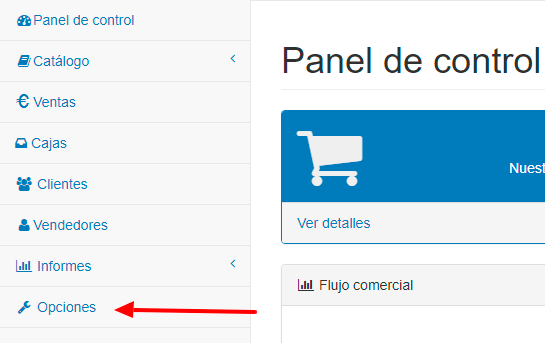
- In the dashboard menu, click Settings.
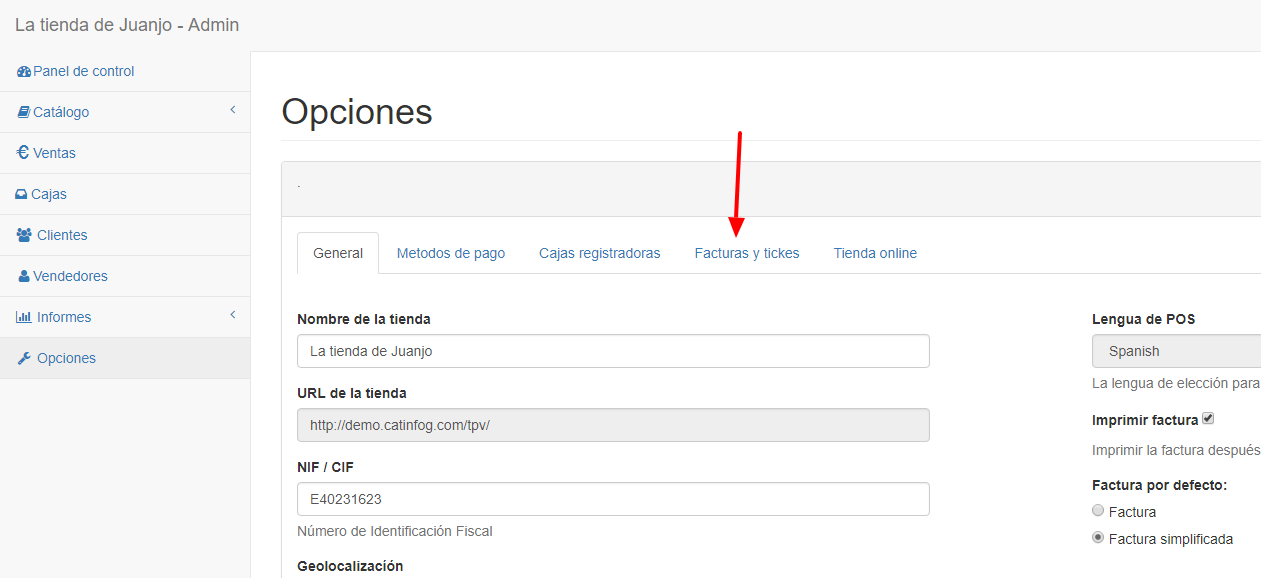
- Click the Invoices and receipts tab
- Then fill in the fields with what you want to appear on the receipt:
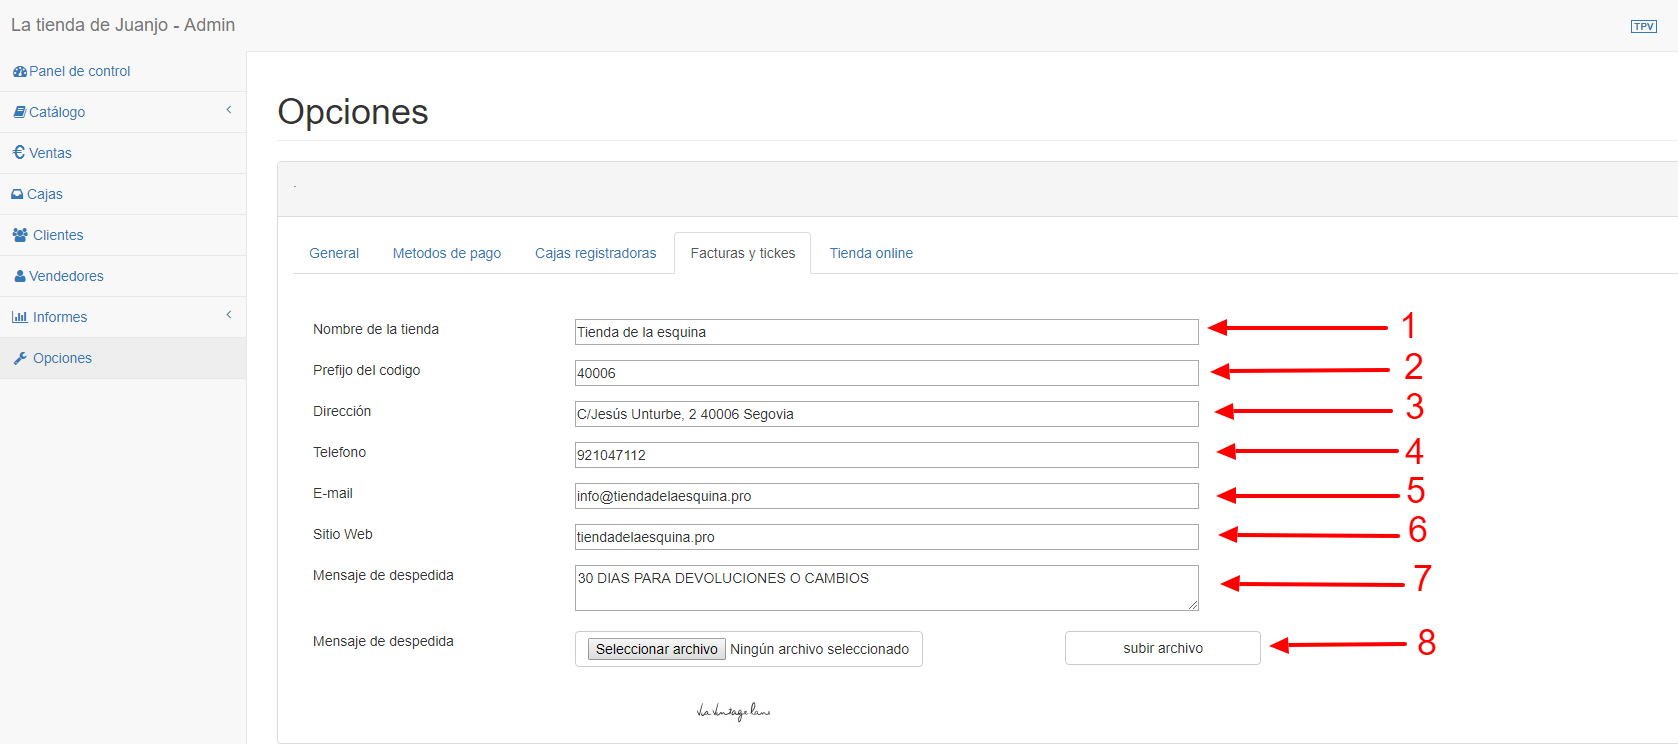
- Your shop’s name.
- Código postal.
- Dirección.
- Teléfono
- Email.
- Sitio web.
- Closing message. Write a sign-off. Most shops put their returns policy and a “See you again soon!”
- Logo (optional). To upload your logo, click “Choose file”, then double-click the logo image on your computer. Finally, click “Upload file”.
- Click Save